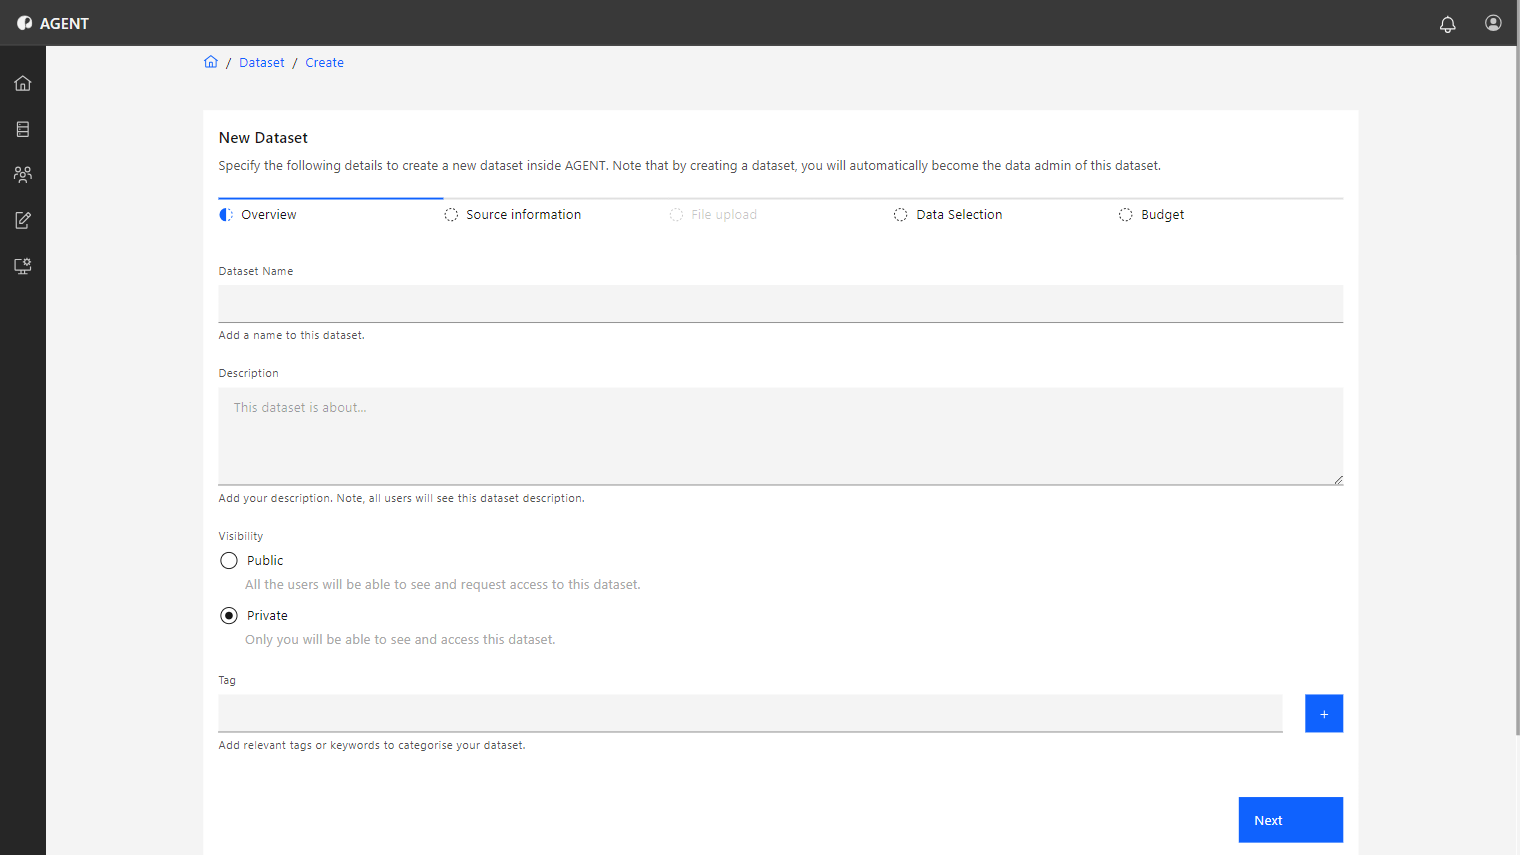
You are directed to the first step of the dataset creation process, the Overview tab, where you can input the dataset's basic information.
Users can create datasets to perform data analysis. The dataset creation process consists of following steps:
You are directed to the first step of the dataset creation process, the Overview tab, where you can input the dataset's basic information.
This step is where you provide the essential details about your dataset. These details help organize and identify your dataset within the platform, ensuring it is discoverable and properly described for future use.
The name of the dataset.
A description of the dataset for all other users to see.
Defines whether the dataset is Public or Private.
Create topic tags associated with the dataset. These tags allow users to quickly check information about the dataset.
The Source Information step is where you define the origin of the information for the dataset.
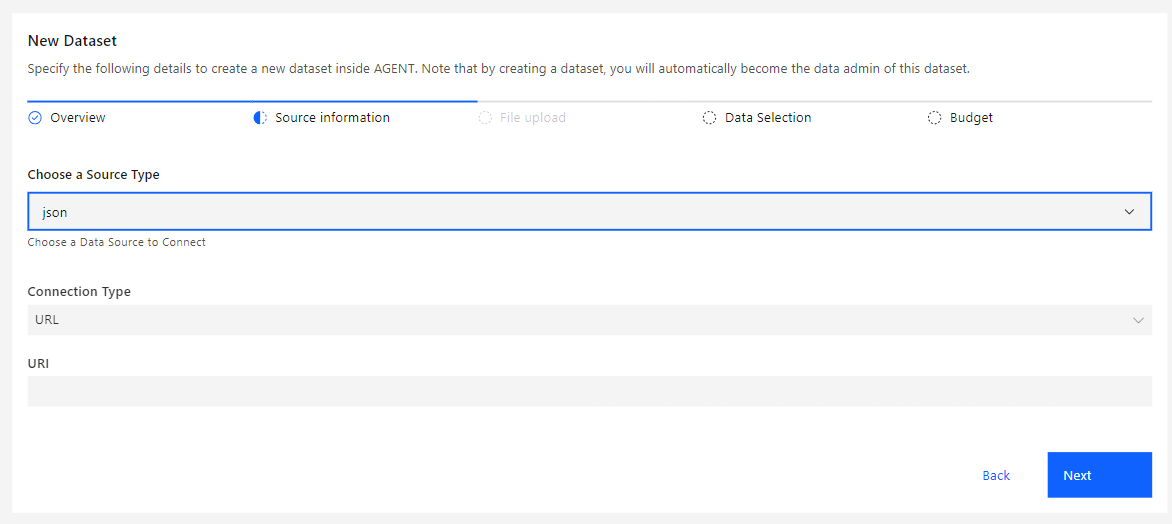
Steps to define Source Information:
Choose the data source to be used. Options are:
Define the origin of the data source.
When File is chosen as the Connection Type, the next step of the creation process will allow you to upload the datasource file.
This step is only available when choosing File as the Connection Type in the previous step. It allows you to upload the local dataset file.
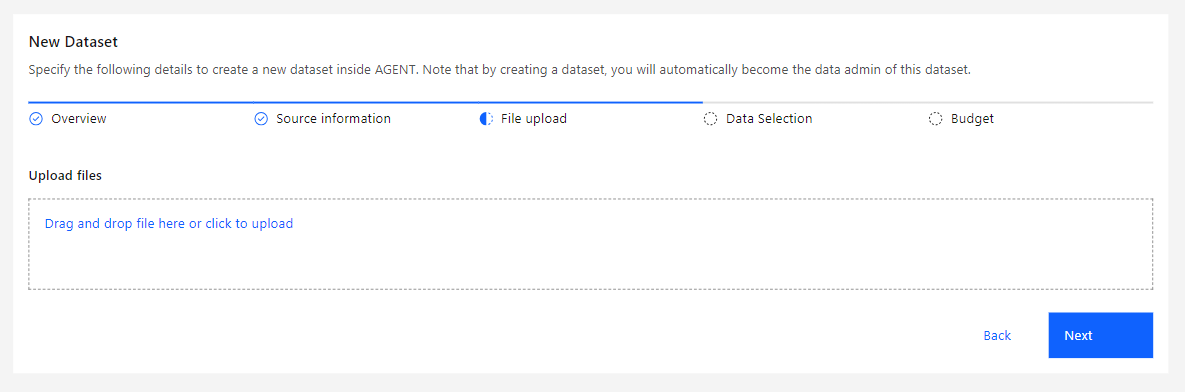
After uploading the file, click Next.
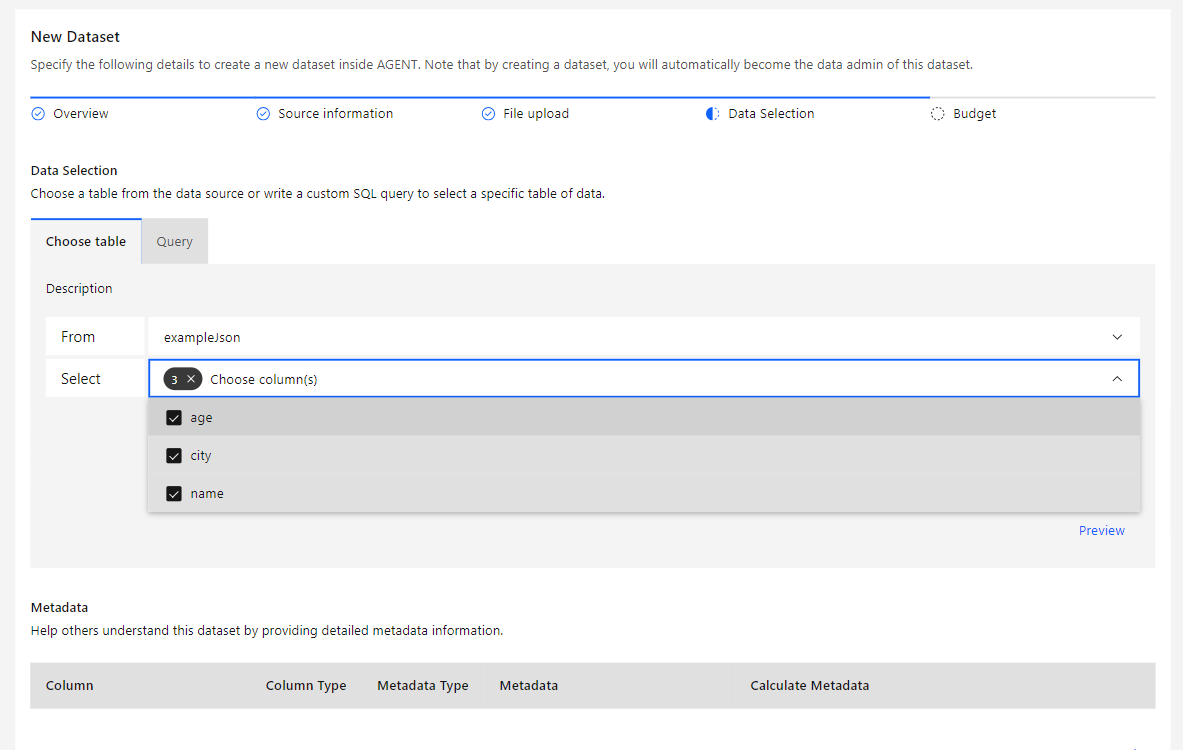
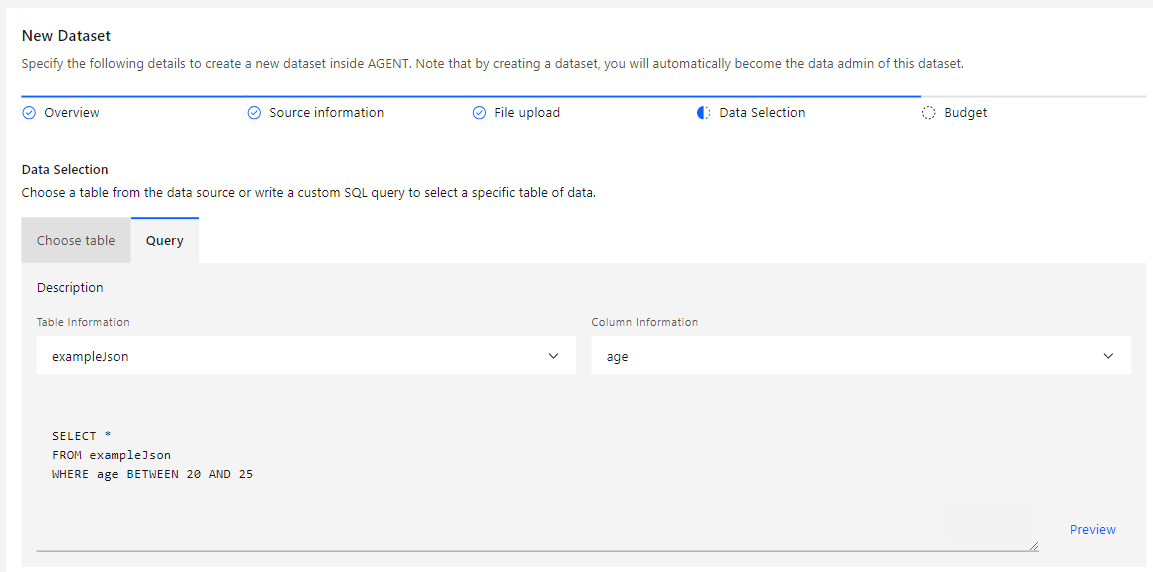
In the Data Selection step, you can configure the dataset’s metadata.
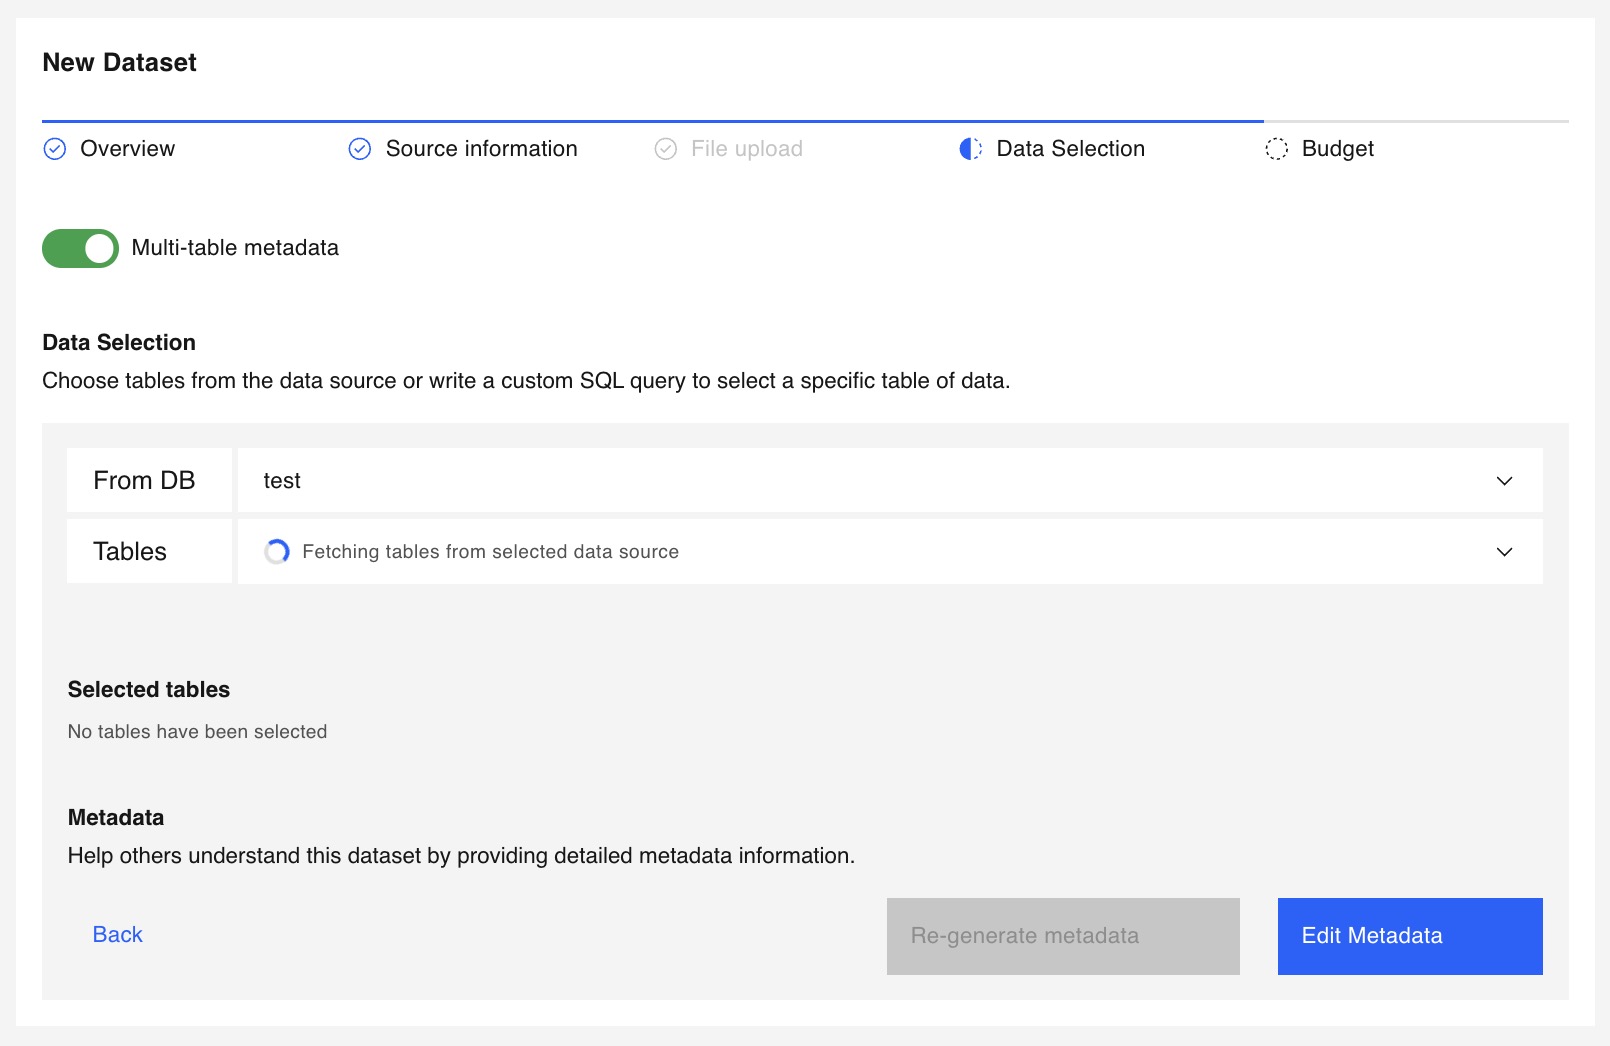
There are two ways to configure dataset metadata: the single-table flow for simple datasets, and the multi-table flow for managing metadata across multiple related tables.
The table and its columns for the metadata can be selected by either choosing them from the dropdown selection or writing a custom query. See the sections below to learn how:
This option is the easiest and simplest way to choose the columns for the metadata. Follow the steps below:

If you wish to calculate the metadata field using Differential Privacy, click Calculate with DP, and a pop-up window will be displayed where you can input the Epsilon to be spent on the calculation.
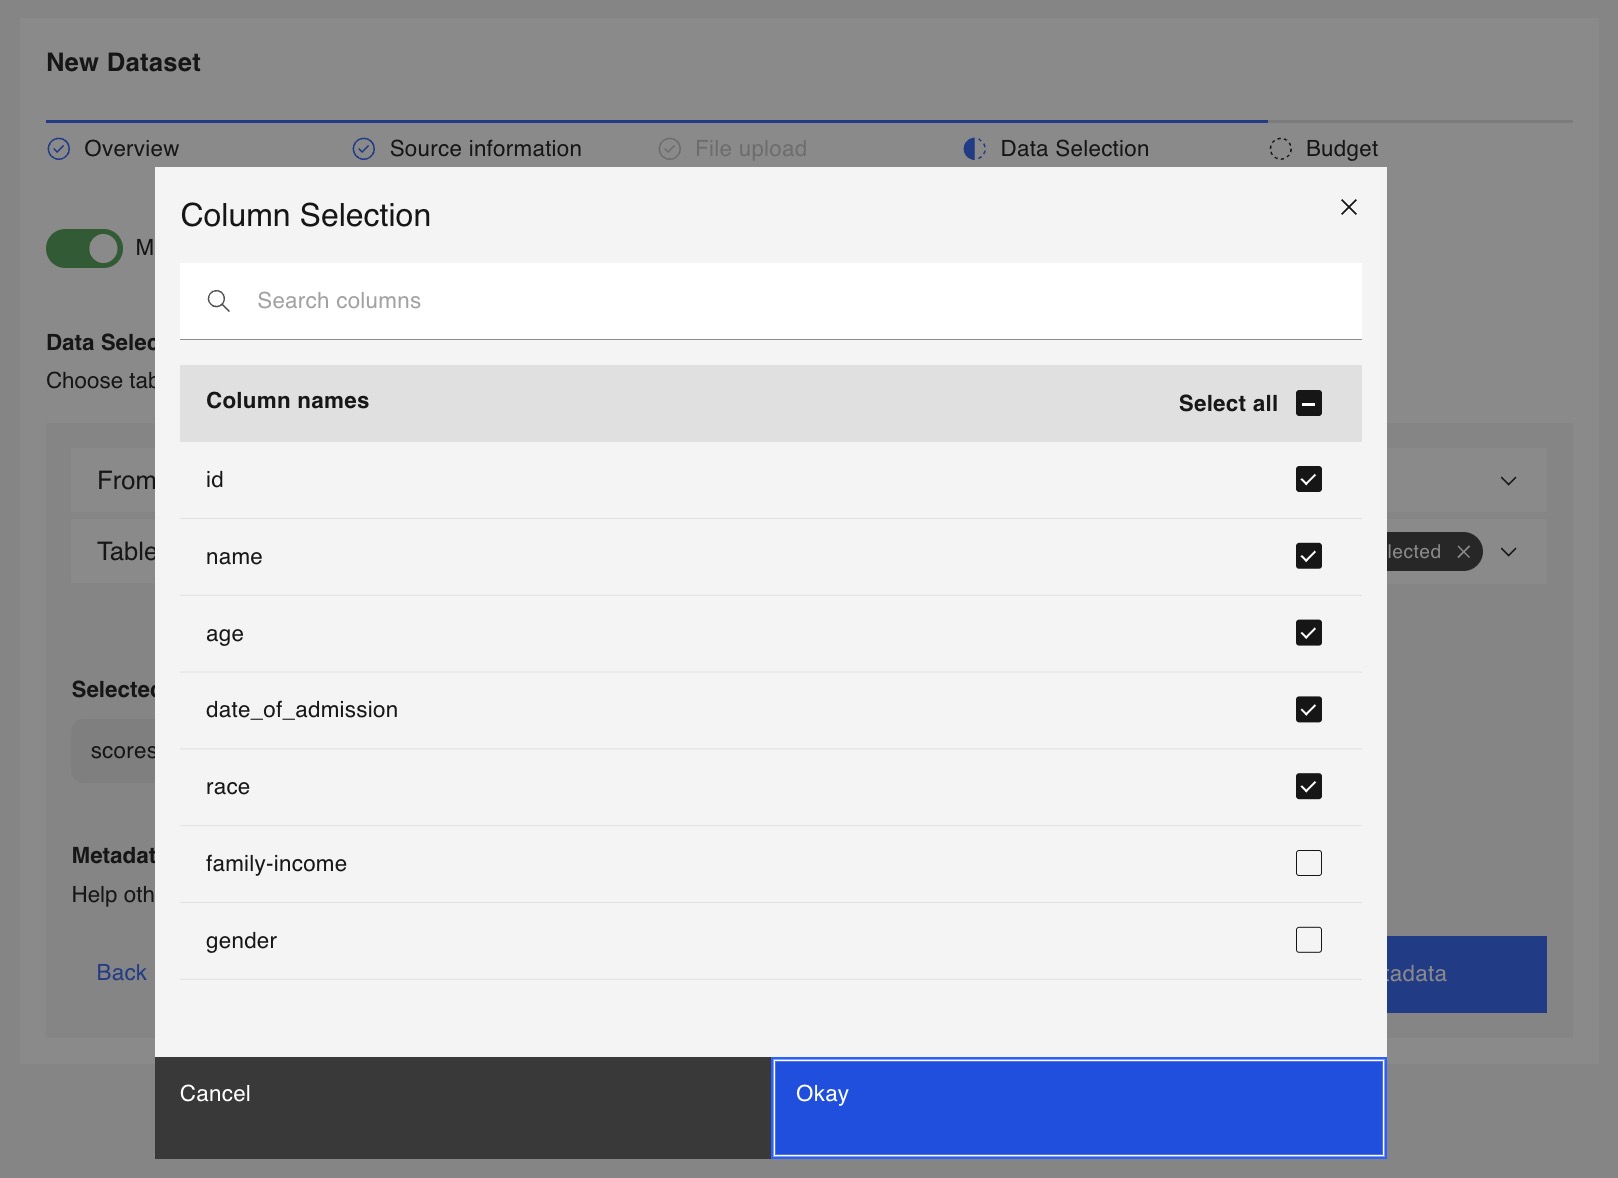
This option is more complex but offers a more configurable approach to selecting tables and columns. Follow the steps below:
If you wish to calculate the Metadata field using Differential Privacy, click Calculate with DP, and a pop-up window will be displayed where you can input the Epsilon to be spent on the calculation.
Use the Multi table flow to set up metadata across multiple related tables.
Follow the steps below to configure multi-table metadata for your dataset.

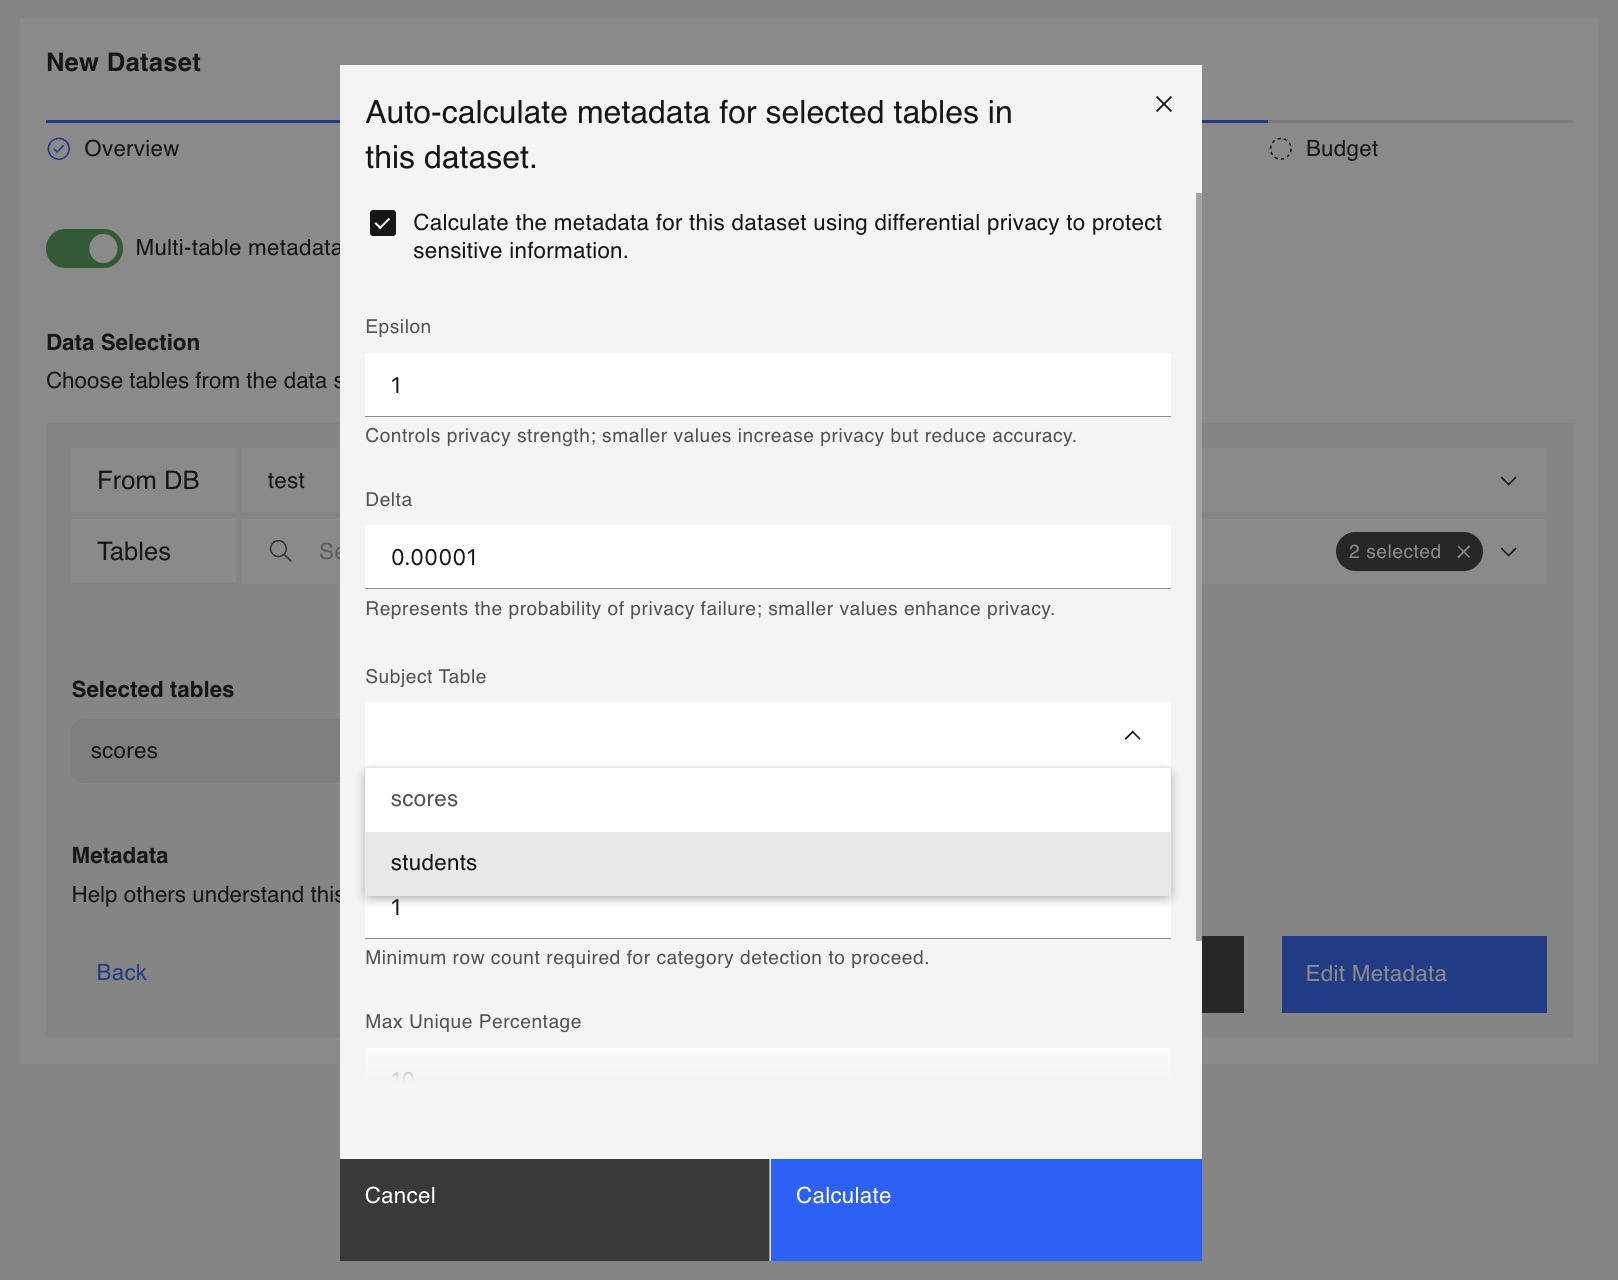
Use the checkbox in the pop-up window to enable or disable Subject Level Differential Privacy for metadata calculation.
To learn more about how we implement Subject Level Differential Privacy, see Subject Level Privacy
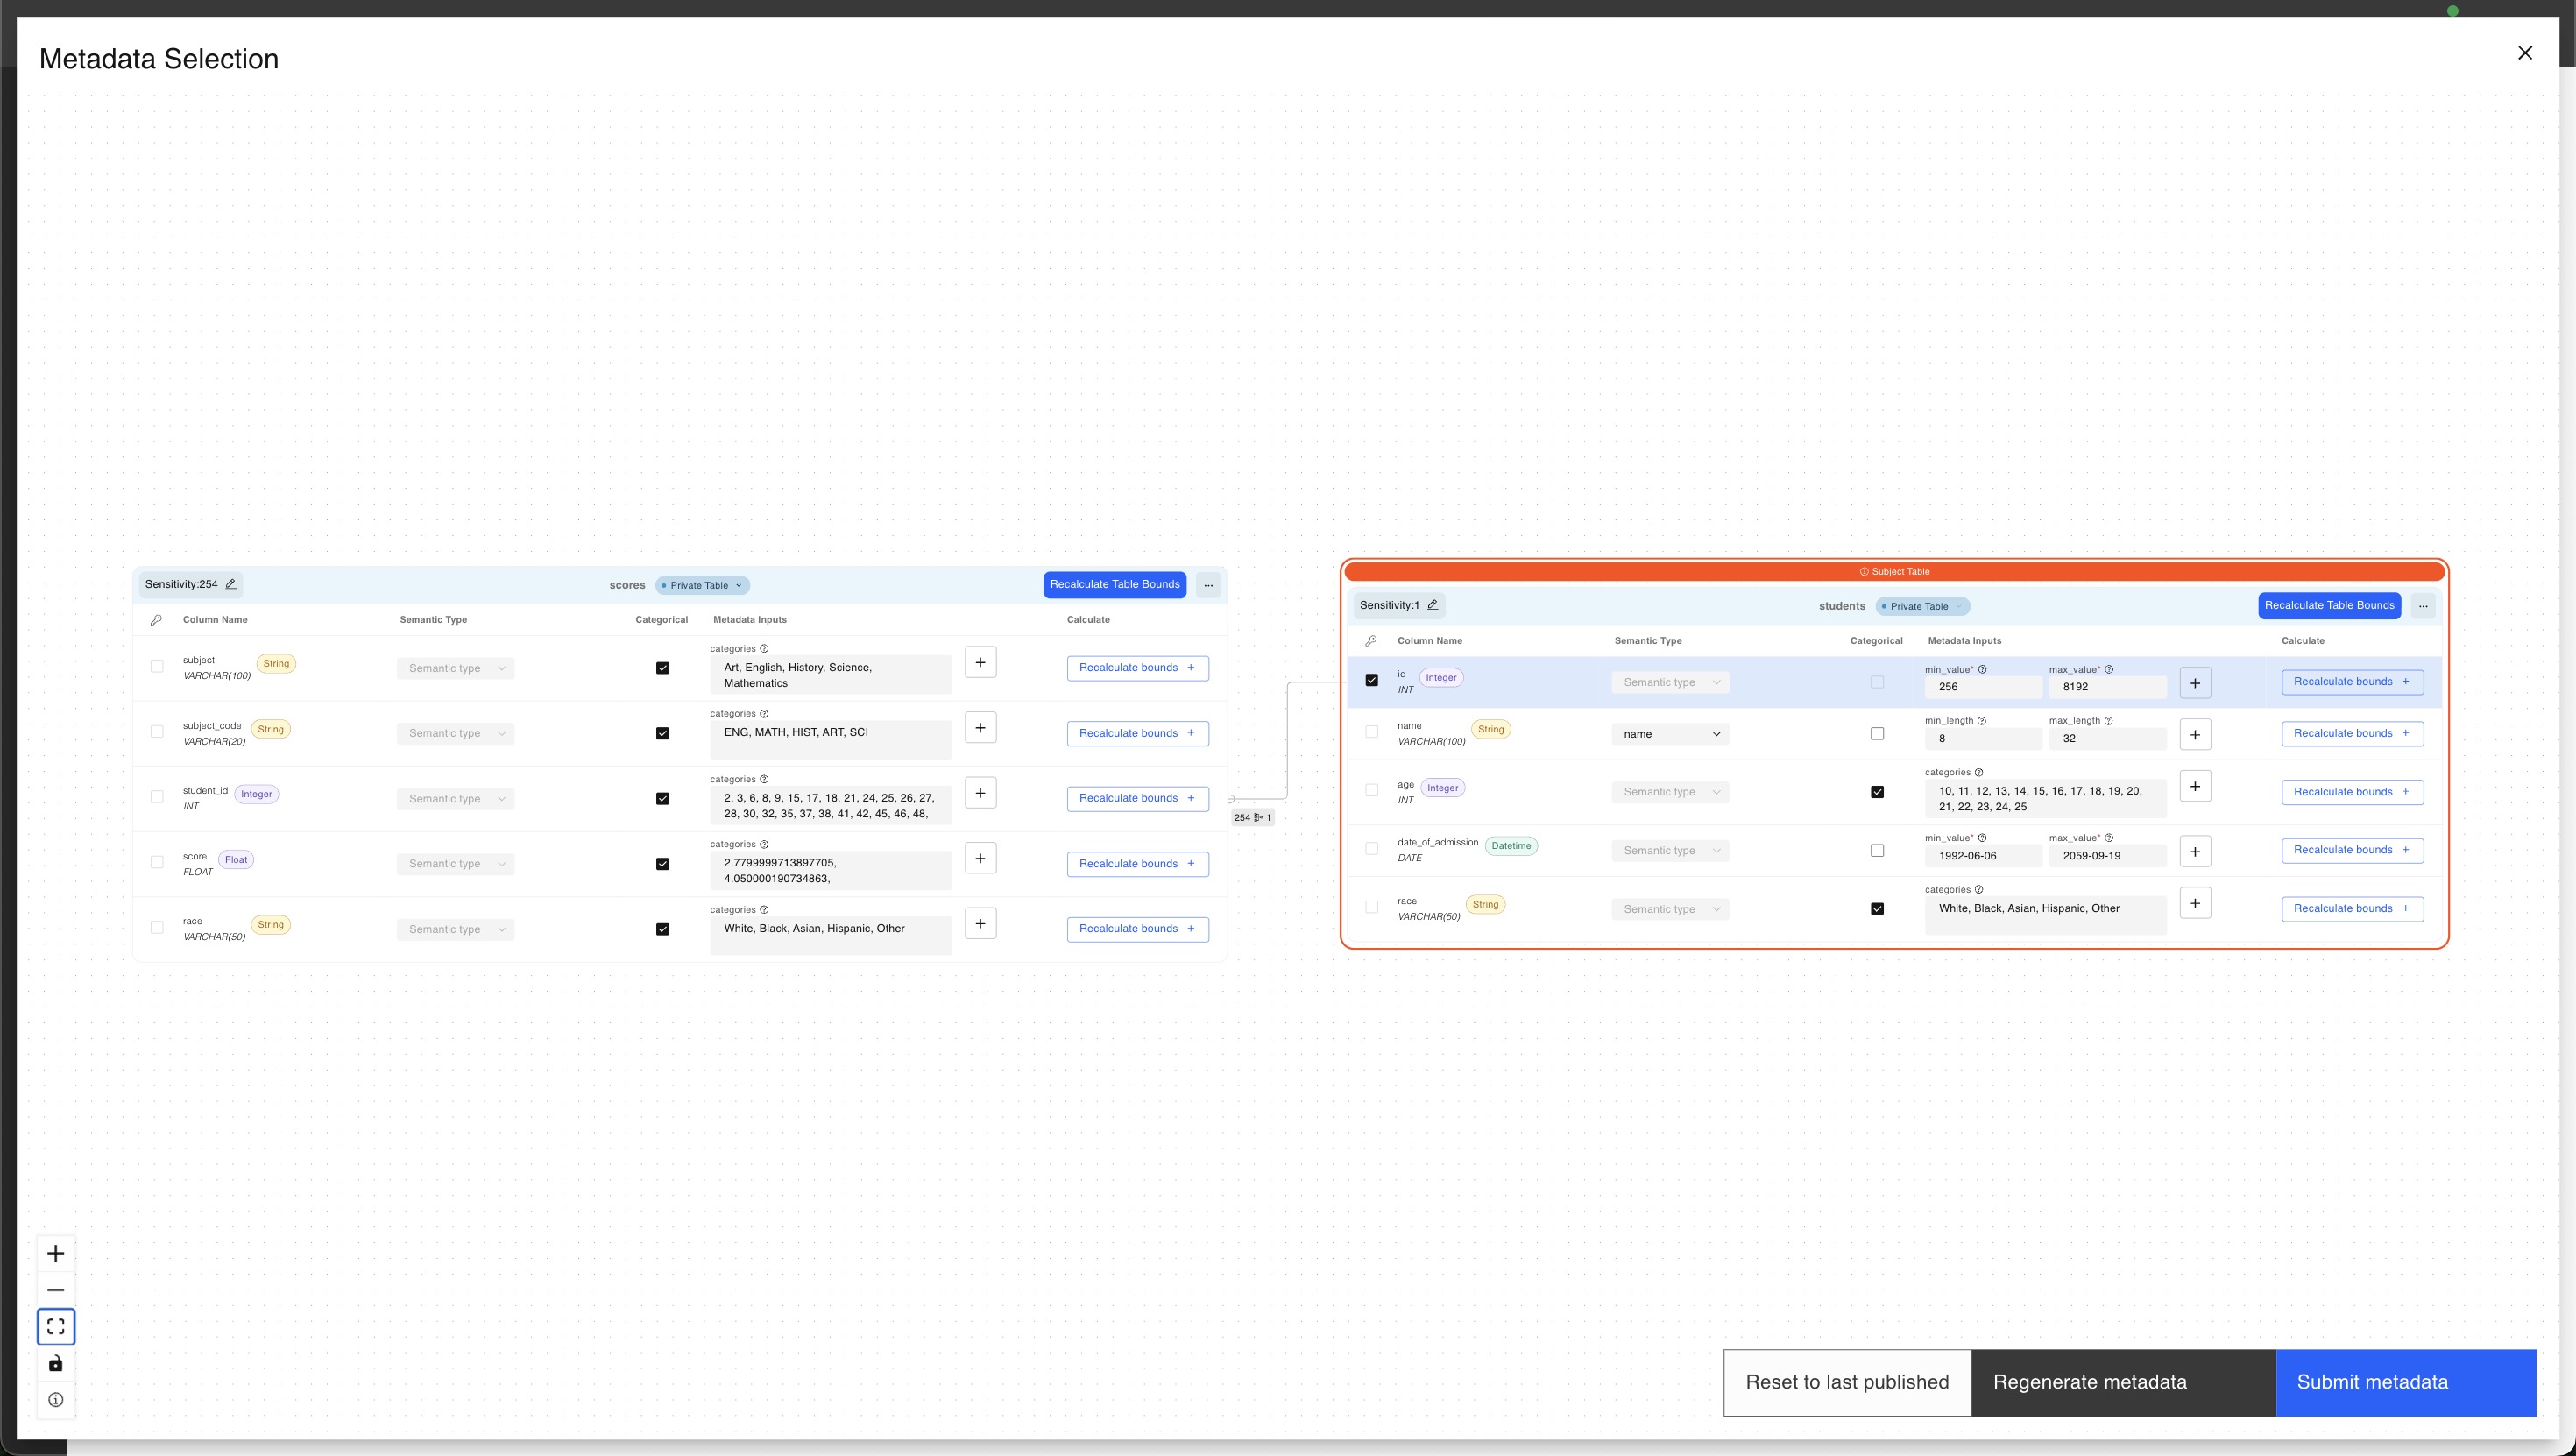
For more information on the visual metadata editor, see Multi-table metadata
The last step of the creation process is the Privacy Budget tab, where you define the dataset's lifetime Epsilon and Delta values. These amounts can be allocated to data scientists and teams, who will then use them to perform queries.
See more information regarding these parameters on the Differential Privacy page.
This Privacy Budget can later be allocated by Team Admins to the team members using the dataset.
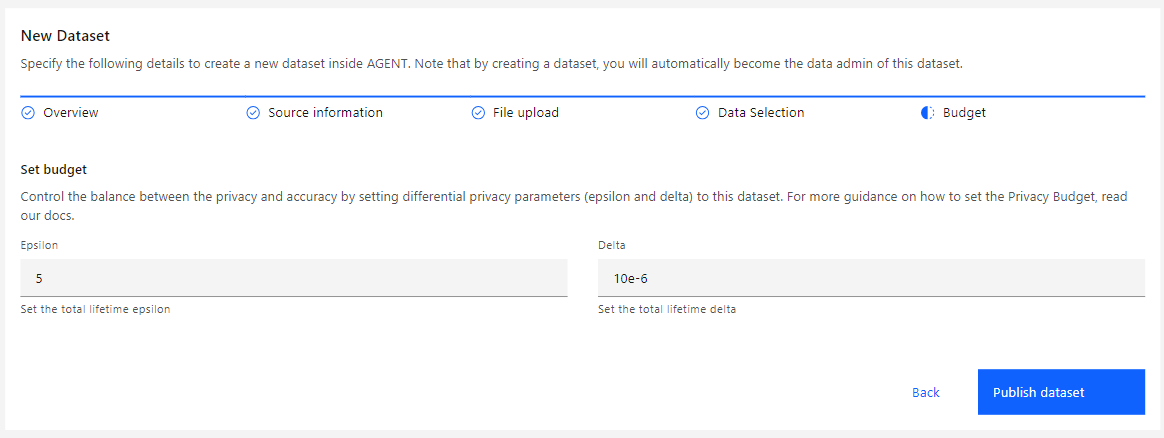
After setting all the values, click Publish Dataset to conclude the creation process.
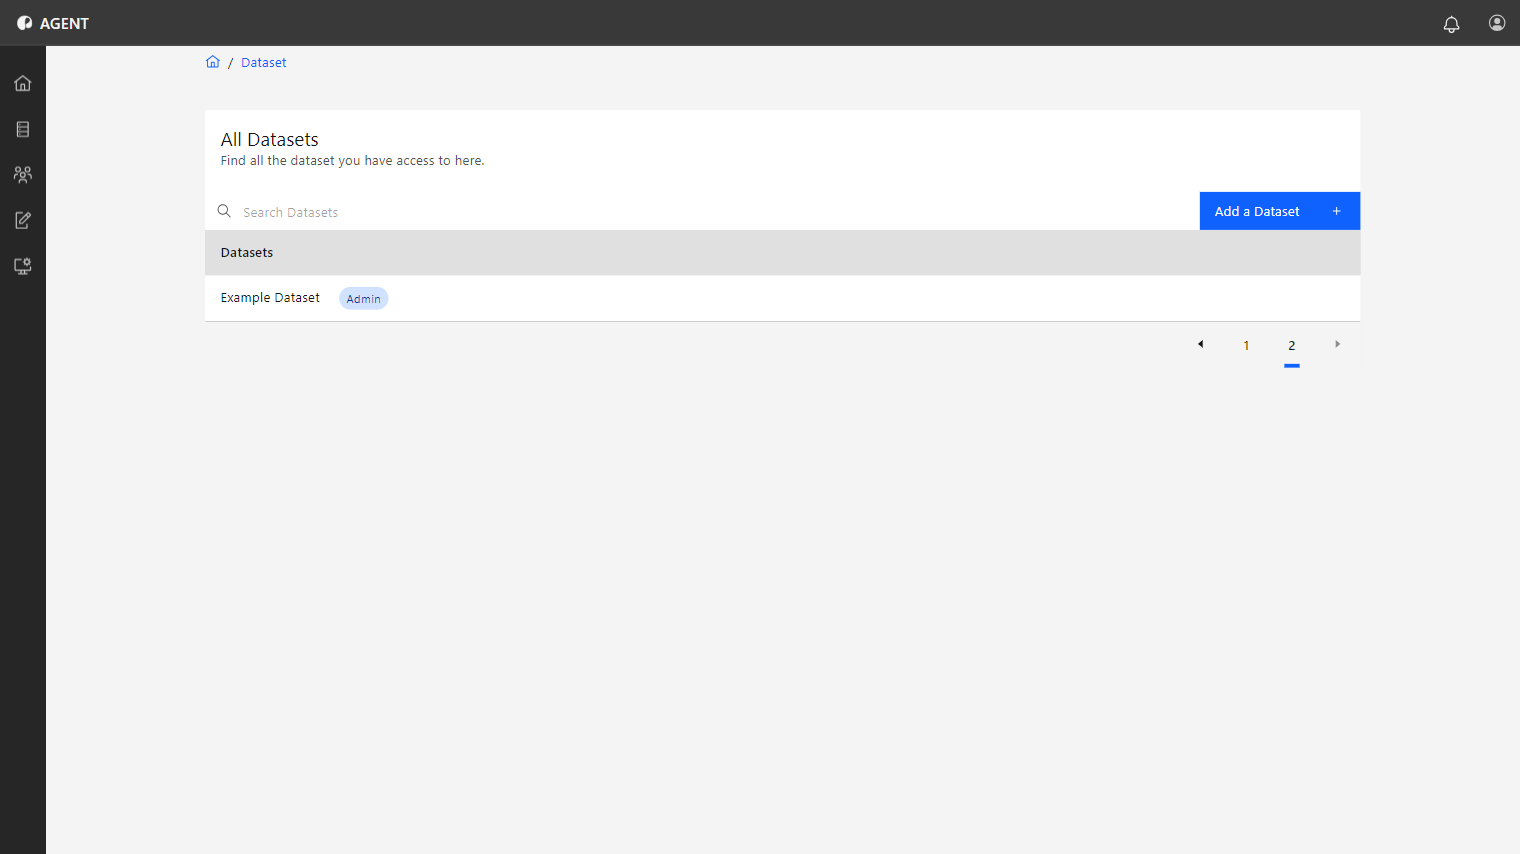
The dataset will now be available in the datasets list and ready for use by teams or users. The Admin tag indicates you possess the dataset admin role for this specific dataset.